A world that has forgotten its heroes, and heroes who have forgotten themselves.
Three travelers begin a journey into a world that has forgotten what it once was.
One longs for a world they never knew.
One remembers a world nobody believes existed.
One carries a legacy they never asked for.
Table of Contents
Prologue
Darkness has crept across Nesis for centuries, so gradually that few remember life before it. The songs speak of the Age of Heroes more like myth than history. They sing of a united world where the races stood as one, with bountiful lands, far reaching roads, lamps that never needed tending and wells that never ran dry, and travelers' greatest danger was the weather. Moss-covered roads vanish beneath ancient forests, while broken watchtowers stand over trade routes no caravan has traveled in generations. Each kingdom hides behind its ever increasing defenses. Elves, humans, and dwarves have long been isolated. Travelers, who once returned with stories of distant kingdoms, now bring warnings, if anything at all.
But sometimes, people whisper the old stories of the heaven-blessed, the Anam, warriors who rose when darkness threatened to consume the world. The Anam drove back the darkness, united the great cities, and brought an age of peace. But three hundred years have passed since, and the peace they forged has nearly vanished.
The Characters
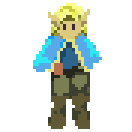
- Class
- Paladin
- Weapon
- Swords
- Race
- Elf
- Age
- 22
- Home
- Laria
The strong are meant to help the weak.
Elias has recently become the master windmill mechanic for the village of Laria. Raised by Mayor Raeges after being found as a child, Elias never knew his parents, or why an elven infant was left in an isolated human village. While most of Laria is content to let the outside world fade into rumor, Elias clings to the stories of distant kingdoms and forgotten lands. No merchant has visited the remote village in decades, and each passing year the tales grow fainter. Still, Elias can't shake the feeling that somewhere beyond the hills, the world is larger than anyone in Laria remembers.
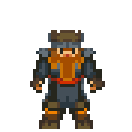
- Class
- Warrior
- Weapon
- Axes
- Race
- Dwarf
- Age
- ?
- Home
- ?
The right path is always simple... if you're an idiot.
Falmri is terse, gruff, and to the point. At least, that's what most people notice first. The older dwarf has never been one for unnecessary words, and he is even less willing to answer questions about himself. He claims 'age' is a private matter and 'home' is a complicated question. Falmri speaks of times most people only know through songs, when dwarves lived openly among humans and elves, when mountain-forged steel was shipped by humans and enchanted by elves. Now the great roads have vanished beneath forests home to roving monsters. The dwarves have retreated into their mountain kingdoms, and humans have hidden behind their city walls.
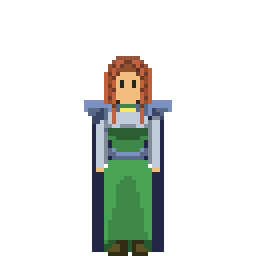
- Class
- Mage
- Weapon
- Staffs
- Race
- Human
- Age
- 20
- Home
- Geneedean Empire
Fate is just an easy excuse for inaction. The same world sits in front of everyone; what we do about it is what matters.
Mia has little patience for hesitation. A sorceress captain of the Geneedean Empire, one of the largest of the great human kingdoms, she is respected among her troops for her skill and feared by those who underestimate her. Mia believes Geneedea's discipline and resolve are the only things standing between its people and the darkness beyond its borders; to her, the Empire is proof that humanity can endure. While other nations hide in mountains or behind walls, Geneedea sends soldiers and protects even its far-flung citizens, and she believes strength is the only reason the Empire and the Westfel Valley still stand. The onslaught of monsters, from the sea, the mountains, and even the sky, threatens it constantly. Dragons have begun appearing over the northern villages with alarming frequency, and Mia and her unit have been sent north on a critical mission to aid them.
Controls
On desktop you can switch between keyboard and mouse at any time. Just use the other one.
| Setup | Description | Tested |
|---|---|---|
| Full keyboard | Two hands, controller-style | Primary |
| Keyboard + mouse | WASD to move, mouse click to act. | Primary |
| Mobile touch | On-screen controller | Primary |
| Mouse only | Point and click | Lightly |
Mouse-only is newer and less tested. Expect rough edges.
Full keyboard
WASD moves with your left hand. O K L ; are the four action buttons under your right, laid out like a controller's face buttons.
| Key | Description |
|---|---|
| L | Confirm · Interact · Attack. The main button. |
| ; | Cancel · Back. |
| K | Open the menu. |
| O | Toggle the scene-exit markers. |
Keyboard + mouse
WASD still moves; the mouse does the rest.
Press WASD to switch to keyboard mode. Move the mouse, without clicking, to switch to mouse mode.
Mouse only
The same point-and-click as mobile touch, without the keyboard.
Mobile touch
On a phone, held landscape, the game draws an on-screen controller: a d-pad on the left and four face buttons on the right, with three shoulder buttons above them: L1 on the left, R1 and R2 on the right.
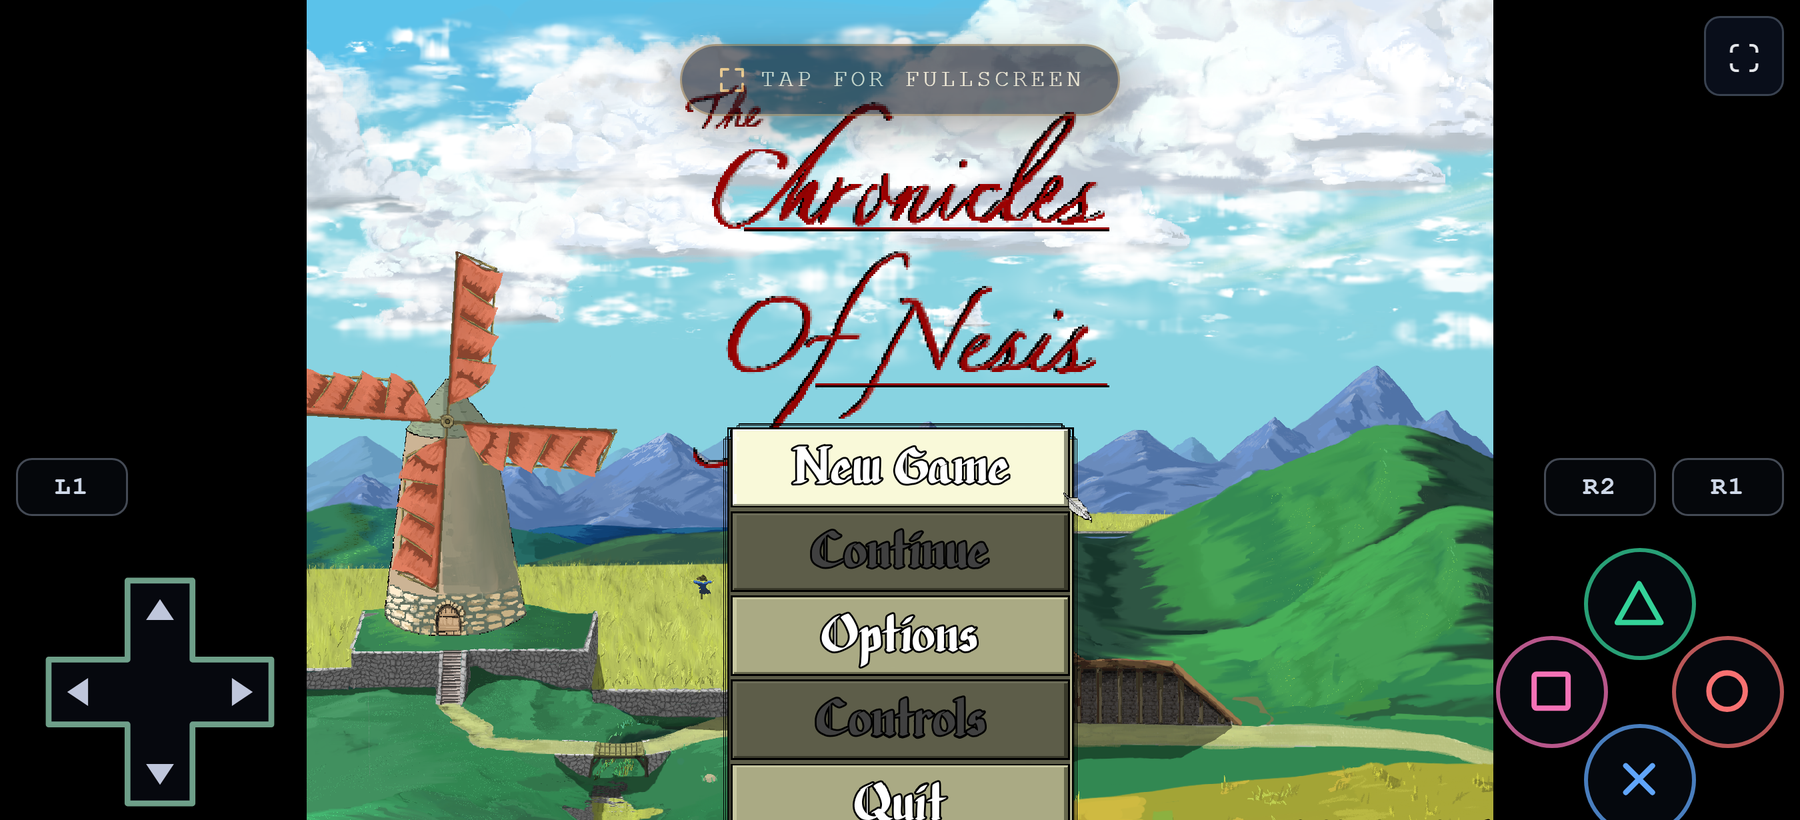
| Button | Description |
|---|---|
| D-pad | Move, and navigate menus. |
| ✕ Cross (bottom) | Confirm · Interact. |
| ○ Circle (right) | Cancel · Back. |
| ☐ Square (left) | Select · Open the menu. |
| △ Triangle (top) | Secondary, such as toggling the scene-exit markers. |
| L1 (left) | Show or hide the combat log. |
| R1 (right) | Battle speed: tap to cycle. |
| R2 (right, inner) | Battle speed: remember one, then hold to use it. |
Cross confirms and Circle cancels, the same as a PlayStation.
Controller
Any controller the browser recognises works. The face buttons match the mobile layout above; the shoulder buttons carry the extras.
| Button | Description |
|---|---|
| Cross | Confirm · Interact · Attack. |
| Circle | Cancel · Back. |
| Square | Open the menu. |
| Triangle | Toggle the scene-exit markers. |
| L1 | Show or hide the combat log. |
| R1 | Battle speed: tap to cycle. |
| R2 | Battle speed: remember one, then hold to use it. |
Battle speed
Tap R1 to step through 1×, 1.5×, 2× and 4×. One more tap returns to normal.
R2 does one of two things, depending on your speed.
| Your speed | Press R2 |
|---|---|
| Faster than normal | Remembers this speed. The pace does not change. |
| Normal | Runs at the remembered speed while you hold it. Release to return to normal. |
Cycle up to 4×, tap R2 to remember it, then return to normal. Now hold R2 to skim a long enemy turn, and release when your own comes round. The remembered speed carries to the overworld. Nothing latches — releasing always returns you to normal.
Exploring
Outside battle you can explore Nesis. Talk to people and look around. That is how you learn about the world, and how you find the best items. NPC dialogue changes as the story moves. Someone with nothing to say today may be worth finding again later.
Treasure
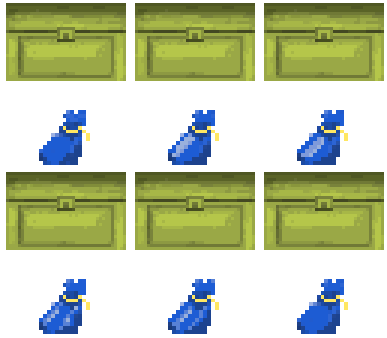 Chests and bags across Nesis hold useful items.
 Relics turn up in dungeons and towns. Each holds a story of the past and a combat mechanic.
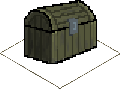 Enemies sometimes drop items in combat. Walk over the chest to take it, before an enemy does or the fight ends.
Resting
 A bed restores HP and MP in full. Some places charge to rest, others do not. Elias' house in Laria is free.
Saving
 Save from the menu almost anywhere, dungeons included. You cannot save during an event or a fight.
The game also keeps one auto-save of its own, overwritten after you change area, win a fight, or move the story forward.
Scene Exits
 An exit marker hovers over every way out of an area. They are on by default; toggle them with

 outside battle.
Controller Icons
 A controller icon shows which mode the game is in: keyboard, mouse, gamepad, or touch (see Controls for details).
Combat
Contact with an enemy starts combat. Sometimes the story starts it instead. The turn queue and stat blocks slide into view at once.
Each unit's Speed sets the turn order, along with how contact was made. Face an enemy as you meet it and you strike first. Let one reach you from behind and it strikes first. Side-on favours neither. Story battles always start even.
Quick tip. Meet enemies in a bottleneck to funnel them in a few at a time, or in the open where an area skill catches several at once.
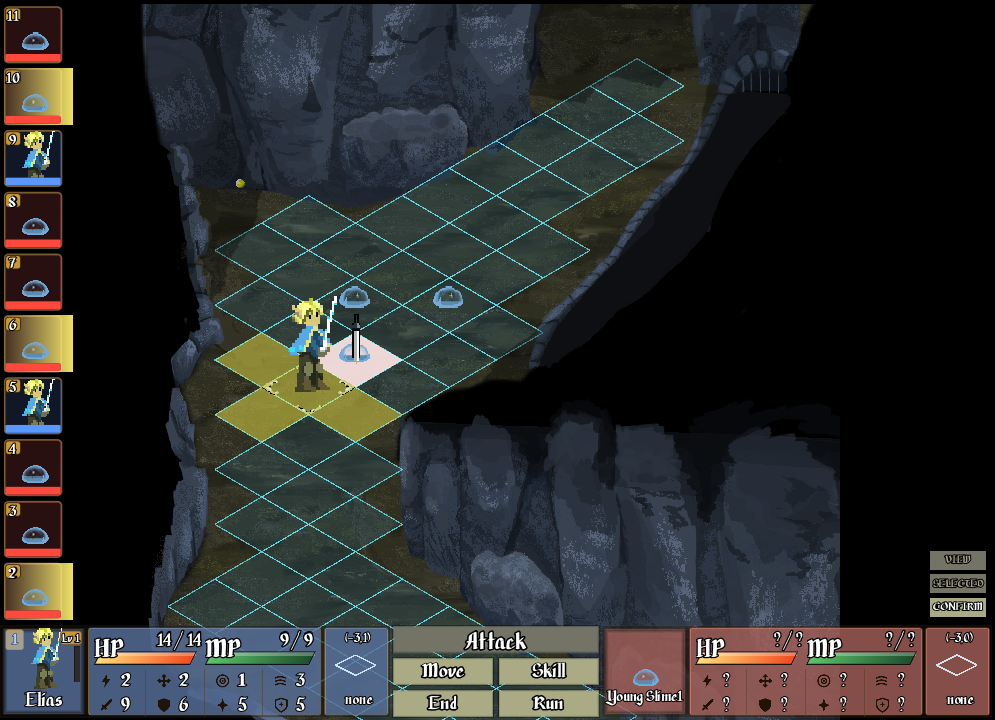
Combat Markers
| Marker | Description | |
|---|---|---|
 | Gilded corners | Marks the cell, or cells, of the active unit. |
 | Vertical sword | Marks the cell you are viewing. Move it with WASD or the mouse. The stat block in the bottom-right corner shows the unit standing there, the terrain under it, and the cell's coordinates. |
Combat Modes
When your turn begins the action menu slides into view. You start in Selected Mode, with the acting unit already selected. Buttons in the bottom-right corner show the three modes, and the current one is lit. Cancel steps back through them, and cancelling out of View returns you to Selected on the current unit.

| Mode | Description | Cancels to |
|---|---|---|
| View | Pan across the grid and inspect units. Triangle opens the full unit detail panel. | Selected (current unit) |
| Selected | Choose what the unit will do, from the action menu. | View |
| Confirm | Choose where that action lands. | Selected |
Action Menu
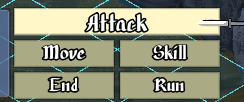
| Action | Description |
|---|---|
| Move | Step across the grid, as far as your Move allows. |
| Attack | Strike within your reach. |
| Skill | Use a learned skill or a slotted relic, usually for MP. |
| End | End the turn, and choose which way to face. |
Moving
You can move to the tiles painted  blue.
blue.
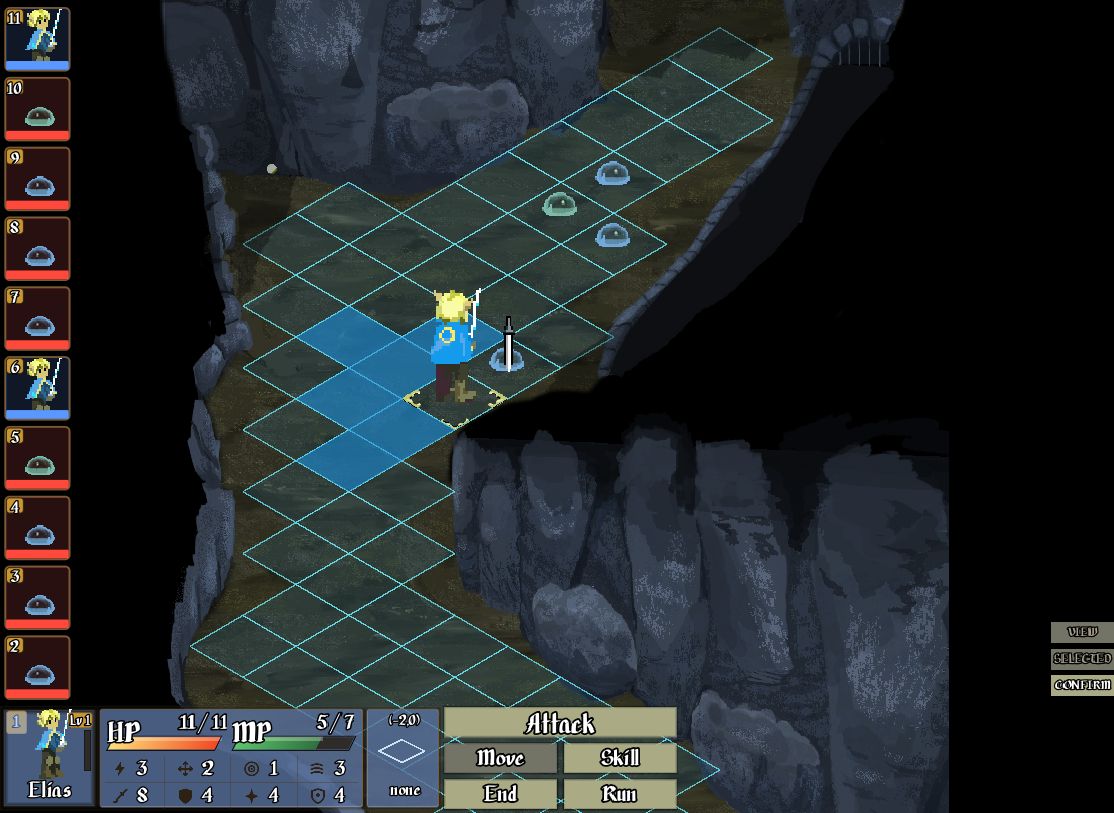
You get one move and one action each turn, in either order. Move then strike, or strike then withdraw. You cannot split your move around your action.
Quick tip. Strike first, then move, to end your turn out of reach. But leaving a threatened cell invites an Opportunity Attack — read the painted cells before you withdraw. Enemies weigh your reaction skills the same way, and will path around them.
Attack & Skill Targeting
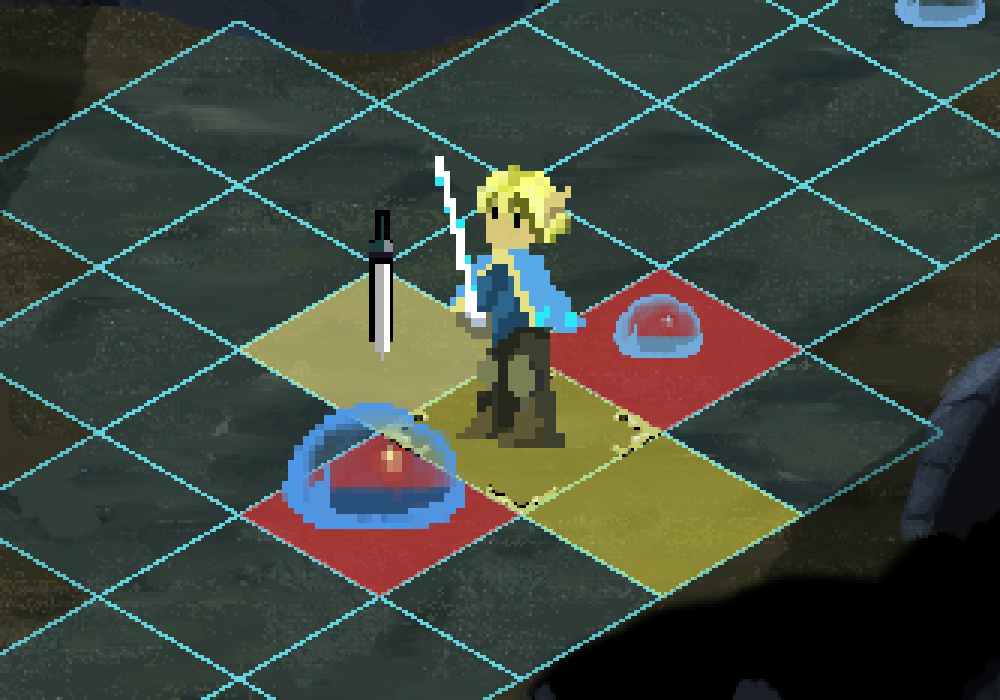
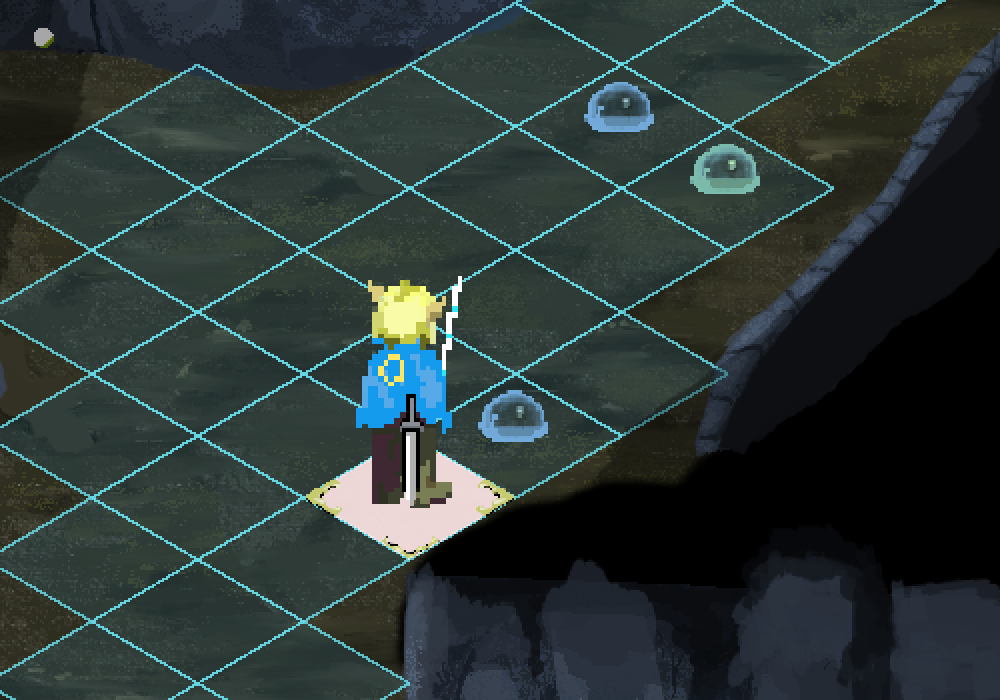
When you confirm an attack or a skill, the grid marks the range, the impact area, and where valid targets stand. An area skill lights more than one impact cell, and those can fall outside the yellow range. All four are flat colours. Anything that pulses is danger. Reach differs by skill. Elias' normal attack reaches one cell, so yellow paints the four neighbours, while Cure and Cleanse reach zero. Both reach further as their Expertise grows, and other skills reach further from the start.
| Cell | Description | |
|---|---|---|
 | Yellow | The range. Every cell you could aim at. |
 | Red | A valid target stands here. |
 | Grey | Inside the impact area, nothing to hit. |
 | White | Inside the impact area, something is there. |
AOE Skills & Multi-cell units
Targeting picks cells, not units. A large enemy stands on several cells at once, and any one of them counts as adjacent. An area attack resolves cell by cell, so covering more of a big unit hits it more than once: cover two of its cells and it is struck twice, cover four and it is struck four times.
◈ Player area skills arrive in Episode Two. For now, only enemies use them.
End a turn: Facing
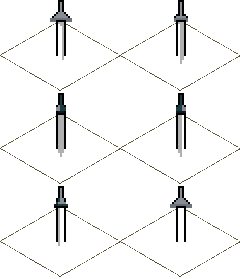
Every player turn ends at the facing picker: four arrows, one for each way the unit can stand.
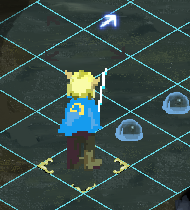
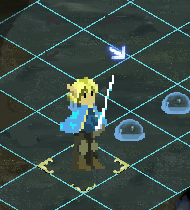
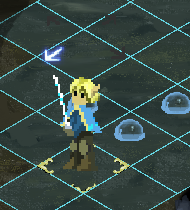
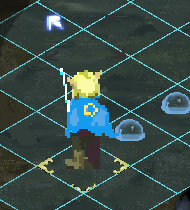
Facing does not change whether a blow lands. It changes how likely that blow is to crit. A strike to the face a unit is turned toward crits least often, a strike to its flank more often, and a strike to its back most often of all. Some creatures have no facing at all, the slimes among them, so there is no back to catch them by.
Danger cells and charging skills
Some powerful skills are cast after a delay, called charging. Cells about to be hit by a charged skill carry impending-damage colouring. Danger cells also appear during your move, when an enemy's reaction skill could trigger.
| Type | Looks like | Description |
|---|---|---|
| Potential | Something could hit you here. | |
| Impending | Damage will land here. When more than one reaction would trigger, a count appears beside the cursor. |
Potential damage cells appear only during your move. They mark a cell that is safe on the path shown, but turns dangerous if you extend the path. An enemy with Opportunity Attack is the common case: step into its range and stop, and the cell is potential; extend the path back out of range and it becomes impending, because leaving provokes the strike.
A charging creature flashes grey and shows a stagger bar at its feet. The charged attack appears in the turn queue. Read the queue, do not count turns.
The stagger bar fills as the creature takes damage, and what is left of it is how much more you must deal. Scan names the exact figure. Fill it and the creature is  Interrupted and its attack is cancelled — it loses its next turn entirely, acting and reacting alike.
A creature cannot perform reactions while charging, or while Interrupted. ◈ In Episode One only enemies charge.
A charge is a gamble on both sides. The creature spends its action and the wait, and can neither act nor react while it winds up; break the bar and it loses the turn that follows as well. Let it land and the blow is far heavier than an ordinary attack.
The danger paint clears while you confirm a target, and returns after.
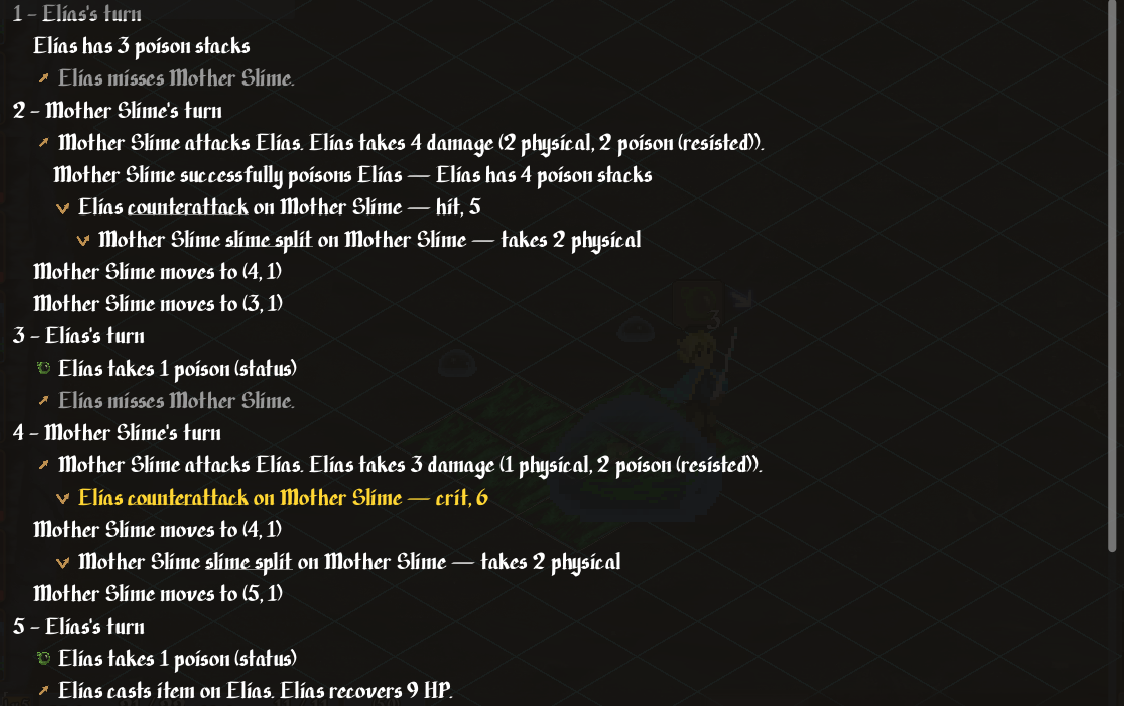
Combat log
The combat log shows each attack's hit chance and result, HIT / MISS / CRIT and the damage. Read it to see why a fight went the way it did. Toggle it with the on-screen LOG button,  on a keyboard, or
  on a controller.
Each turn opens with a header naming the unit acting. Its move and action follow.
An indented line was caused by the line above it. A Counterattack sits under the blow that triggered it. Read the indents to see what answered what. Reactions never stand alone.
Damage lines carry their detail. (resisted) means that part landed weakened. (immune) means it did nothing. Status symbols sit beside the unit that gained one. When an enemy readies a slow skill, the log names it.
WASD or the mouse wheel scrolls the log.
Damage Types, Status Effects and Affinities
There are seven damage types. The six magical types each have a status effect and a ground effect. Units can have affinities for all seven.
Physical defense blocks Physical. Magic defense blocks every element.
| Damage type | Category | Status | Ground | |
|---|---|---|---|---|
 | Physical | Physical | (none) | (none) |
 | Poison | Magical |  Poisoned Poisoned | 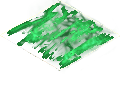 Poison Poison |
 | ◈ Acid | Magical |  Acid Covered Acid Covered |  Acid Acid |
 | ◈ Ice | Magical |  Chilled Chilled | Icy |
 | ◈ Fire | Magical |  Burning Burning | Aflame |
 | Radiant | Magical |  Blinded Blinded | Hallowed |
 | ◈ Necrotic | Magical |  Cursed Cursed | Cursed |
Status effects
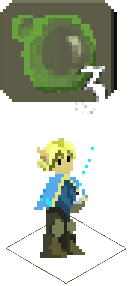
Any unit under a status effect carries an icon above it, or icons stacked when there is more than one. Every status effect that lands adds a stack. At the end of your turn one stack is spent and the effect takes hold — poison deals its damage. While poison stacks remain, your hit chance drops and attacks against you land more often. More stacks mean more turns under the effect. Stacks also draw more of the same: the more poison you carry, the more likely the next dose takes hold.
| Status | Comes from | Description | |
|---|---|---|---|
| Poisoned | Poison | Small damage every turn. Less likely to land hits, more likely to be hit. |
| ◈ Acid Covered | Acid | Damage every turn, and reduced physical defense. |
| Blinded | Radiant | Much less likely to land hits, much more likely to be hit. |
| Interrupted | A broken charge | The charged attack is cancelled, and the creature loses its next turn — it can neither act nor react. |
 | ◈ Restrained | Web ground | Cannot move, but can still attack from where it stands. |
| ◈ Chilled | Ice | Movement reduced. |
| ◈ Burning | Fire | Moderate damage every turn. |
| ◈ Cursed | Necrotic |
Ground effects
| Ground | Description | |
|---|---|---|
| Poison | A chance to become Poisoned each time it is walked on. The Mother Slime lays it as she moves, and it lasts the rest of the fight. |
| ◈ Acid | Damages whoever walks on it and applies Acid Covered. |
 | ◈ Web | Costs double movement to cross, with a chance of Restrained. |
| ◈ Icy | Costs double movement to cross, with a chance to fall prone. | |
| ◈ Aflame | Applies Burning, and a Burning unit leaves an Aflame trail. | |
| ◈ Hallowed | Radiant ground. |
Status Affinities
Beyond raw defense, a unit can have an affinity to a damage type.
| Mark | Affinity | Description |
|---|---|---|
 | ◈ Vulnerable | Damage type does double damage. |
 | ◈ Resistant | Damage type does half damage. |
 | Immune | Damage type does no damage. |
 | Absorb | Damage type heals instead of damages. |
A permanent affinity shows in the unit's status details panel, readable only with Scan at enough Expertise. A temporary affinity shows as a bubble above the unit, with the turns remaining on it.
◈ Vulnerable and Resistant arrive with the wider damage-mitigation pass.
Skills
You learn skills in two ways:
- Class skills, earned on your class tree by spending SP.
- Relic skills, granted by a relic you have slotted. A relic is an item you own.
Three skill types
Whether it comes from your class tree or a slotted relic, every skill is one of three types.
| Relic | Icon | Kind | Description | Examples |
|---|---|---|---|---|
 |  | Action | used on your turn, often costs MP |  Smite Smite  Cure Cure  Cleanse Cleanse |
 |  | Reaction | triggers automatically in response to something |  Counterattack Counterattack  Parry Parry |
 |  | Passive | always on, no input needed |  Scan Scan  Health-up Health-up |
Class skills
Unlocked by spending SP on your class tree. The tree mixes skills, ability-score nodes that raise a raw stat, and Relic Slot nodes.
Expertise on a class skill unlocks further improvements, but those still have to be purchased in the skill tree. Nodes that need Expertise carry a  lock. Revisit the tree whenever a class skill gains Expertise.
Passive class skills can be disabled in the Skills menu. Passive relic skills cannot be disabled, though the relic itself can be unequipped. A passive skill earns no Expertise while it is disabled, and enabling it does not guarantee Expertise either.
Relic skills
It is said a relic carries the story of a hero, and an Anam can tap into that hero’s strength. The Prologue tells more of the Anam.
A relic is an item you can find in the Items menu and equip in the Skills menu. In your bag it does nothing. Slot it into a Relic Slot to turn on the skill it grants. You start with one Relic Slot; further slots are unlocked on the class tree.
Episode One relics:
| Relic | Description |
|---|---|
| Item | Use consumables such as  Mugwort during combat. Mugwort during combat. |
| Scan | Reveals hit chance, enemy HP/MP levels, and the damage still needed to break a charge. Without it you aim blind. |
| Move | Increases movement range. |
| Health | Increases total HP. |
| Berserk Counter | Reaction to physical damage, temporarily increasing incoming physical damage in exchange for physical damage output. Dropped by the Mother Slime. |
Expertise: skills grow with use
Every skill and relic earns Expertise as you use it in battle. At milestones it improves: harder hits, longer reach, lower cost. Expertise belongs to the relic, so it moves when the relic moves.
See what is needed to increase a particular skill’s Expertise on the Skill Details panel of the Skills menu.
Growth & Status
| HP | Health Points. |
| MP | Magic Points. Restore with Irid Liquor. |
| XP | Experience. |
| JP | Job Points. Granted at each level-up. Spend on raw stats in the Status menu. |
| SP | Skill Points. Granted at each level-up. Spend on your class tree in the Skill Tree menu. |
| EP | Expertise Points. Earned by using a skill or relic. |
Stats
There are two types of stats: raw stats, which you increase at level-up, and battle stats, which are determined from your raw stats and the equipment you wear. Stats can also be altered by status effects.
Raw stats
Spend JP in the Status menu to raise a raw stat, or buy stat nodes in the class skill tree.
Three special raw stats, called accumulator stats, cannot be purchased directly. They grow on their own at level-up according to their paired stats, shown in the table below.
Accumulator stats weigh heavily on battle stats. The pairs you invest in shape a build well beyond the raw numbers on the page.
Each class has core stats set by its class tree. Invest further in those, or diverge for a different playstyle.
| Raw stat | Feeds | How you raise it |
|---|---|---|
| Strength | Physical Attack, Health | Spend JP |
| Constitution | Physical Defense, Health, Magic Defense | Spend JP |
| Stamina | Physical Attack, Physical Defense | Accumulates from Constitution + Strength |
| Dexterity | Physical Hit, and a share of Physical Attack, Dodge and Defense | Spend JP |
| Agility | Physical Dodge, Move, Magic Dodge | Spend JP |
| Speed | Reflex, Physical Hit, Physical Dodge | Accumulates from Agility + Dexterity |
| Intelligence | Magic Attack, Magic Hit, Magic Dodge, Magic Defense, Mana | Spend JP |
| Wisdom | a share of almost everything, physical and magic alike | Spend JP |
| Knowledge | Magic Attack, Magic Hit, Magic Dodge, Magic Defense | Accumulates from Intelligence + Wisdom |
| Luck | Critical chance | Spend JP |
Battle stats
Each battle stat has one primary raw stat that moves it most, with others chipping in. To raise a battle stat, invest in the raw stat that feeds it.
Battle stats update in real time as you spend on raw stats, before you save, so you can see exactly where an investment lands.
| Battle stat | Grows most from | Also from | |
|---|---|---|---|
| HP | Constitution | Strength | |
| MP | Intelligence | Wisdom, Constitution | |
 | Move | Agility | Dexterity |
 | Reflex | Agility | Dexterity |
| XP Mod | Intelligence | Wisdom | |
 | Physical Attack | Strength | Dexterity, Constitution |
| Physical Hit | Dexterity | Wisdom, Strength, Agility | |
 | Physical Dodge | Agility | Dexterity, Wisdom, Strength |
 | Physical Defense | Constitution | Strength, Dexterity |
 | Magic Attack | Intelligence | Wisdom, Dexterity |
| Magic Hit | Intelligence | Wisdom | |
| Magic Dodge | Intelligence | Wisdom, Agility | |
 | Magic Defense | Intelligence | Wisdom, Constitution |
No attack is certain, and none is hopeless. The attacker's Physical Hit is weighed against the target's Physical Dodge; magic uses the magical pair.
A physical blow that lands can also crit, for half again the damage. Dexterity and Luck carry that chance in equal measure, with Wisdom adding a little, and where you are standing does the rest.
Items & Equipment
| Symbol | Kind | Description |
|---|---|---|
| Consumable | Used once and consumed. Can be used outside combat, or in combat with the Item relic. |
 | Equipable | Can be equipped from the Equipment menu. |
 | Relic | Can be equipped from the Skills menu, according to your slot count. |
 | Key | Key item, can't be sold. |
Quick tip. Buying or finding something is not the same as using it. Equipable gear does nothing until you put it on in the Equipment menu. A relic does nothing until you slot it in the Skills menu.
Laria General Store
| Item | Price | Description |
|---|---|---|
| Valerian Powder | 25 | Cures Poisoned. |
| Mugwort | 40 | Heals a little HP. |
| Leather Boots | 60 | Slightly raises Reflex, Physical Hit, Physical Dodge and Physical Defense. |
| Irid Liquor | 100 | Restores MP. |
| Leather Chestpiece | 150 | Raises Physical Defense. |
Menus
Open the menu with Space / K / Tab, the on-screen menu button, or ☐ Square on a controller.
| Menu | Description |
|---|---|
| Items | use / view consumables |
| Equipment | equip weapon / armor / accessories |
| Status | spend JP to raise raw stats |
| Skills | slot relics, use/view skills |
| Skill Tree | spend SP to unlock skills + nodes |
| Save / Load | save your game |
| Options | sound, music, fullscreen, dialogue size |
| Quit | leave the game, after a confirm |
Status: buying stats with JP
The Status menu is where you spend JP (Job Points) to raise your raw stats, your permanent build.
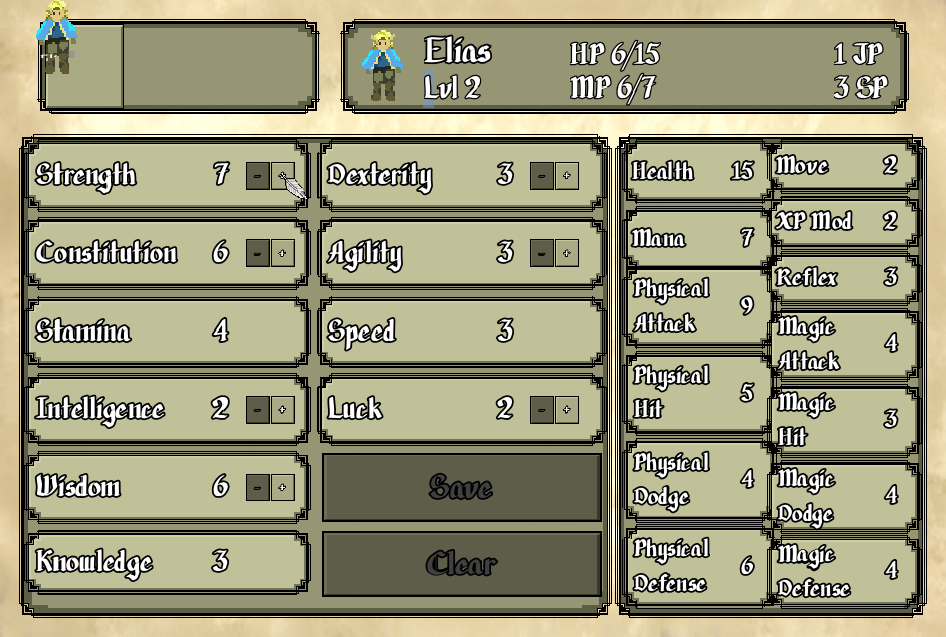
Press + / − on a stat to buy it (each costs JP), then Save to lock it in (Clear resets). Your JP at the top of the menu falls as you spend, and the battle stats on the right recalculate as you go, so you can see what a point would do before you commit to it. Nothing is final until you Save: take a point back, or Clear the lot, and try a few combinations to see what moves. Battle stats are calculated from your raw stats and you never edit them directly. The stats without −/+ (Stamina, Speed, Knowledge) are accumulators, they grow on their own at level-up from your past investment (see Growth & Status).
Skill Tree: learning skills with SP
The Skill Tree (your class tree) is where you spend SP (Skill Points) to unlock skills, stats, and additional relic slots.
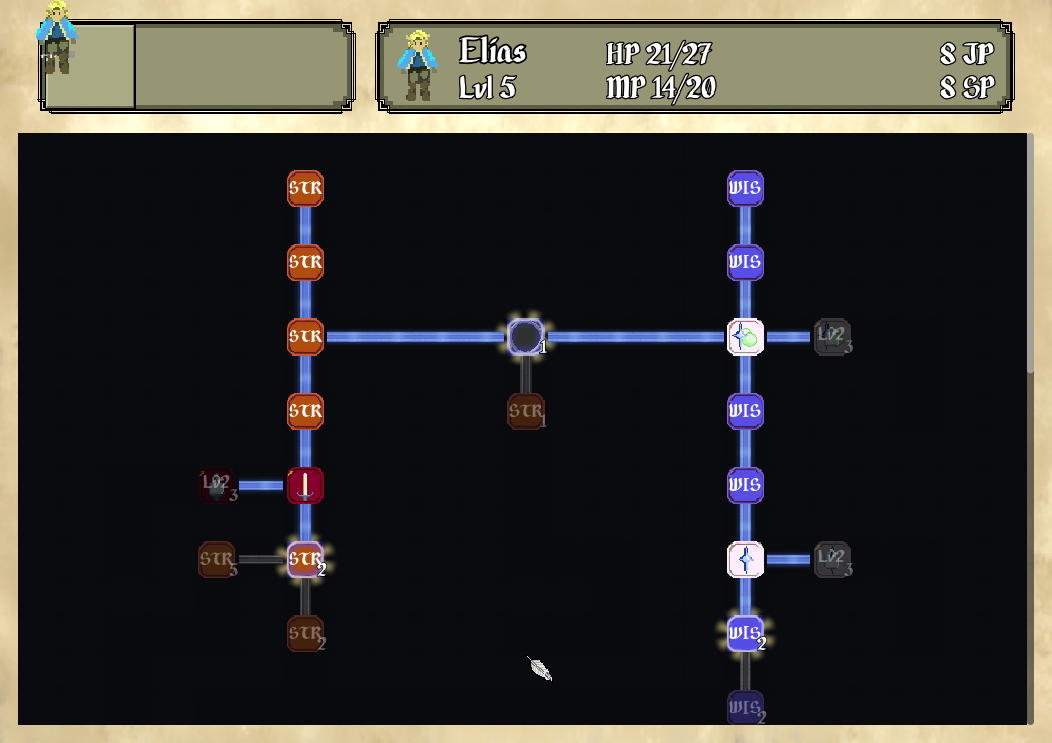
| Node | What it is | |
|---|---|---|
 | Stat | Raises one raw stat, permanently. |
 | Skill | An action, a reaction, or a passive. Use it from the Skills menu or in battle. |
 | Relic Slot | Gives you another Relic Slot. Fill the slot in the Skills menu. |
A relic improves on its own as its Expertise grows. A class skill does not: Expertise only unlocks the next tier on the tree, and you still pay that node's SP cost to take it.
Each node has a cost that appears in the bottom right corner.
Skills: using skills & slotting relics
The Skills menu lists the skills you've learned and holds your Relic Slots.
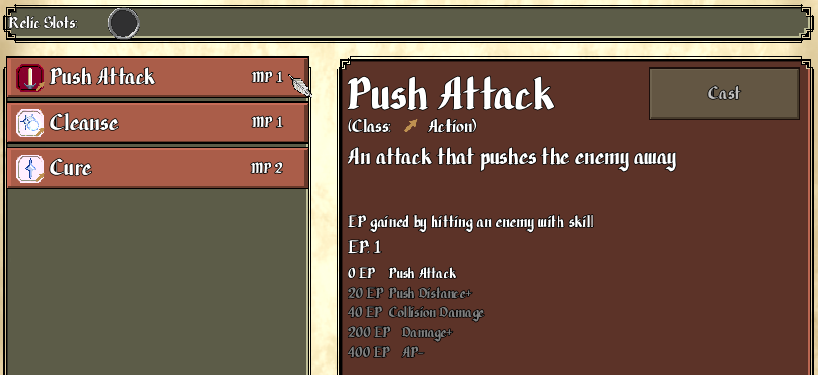
Pick a skill on the left (each shows its MP cost) to see its detail panel, type, effect, and its Expertise (EP) growth tiers. The Cast button uses the skill right there, many work outside combat too (e.g. Cure to heal or Cleanse to clear a status between fights). Drop a relic you own into a Relic Slot (unlock slots in the Skill Tree) to turn its skill on.
Equipment: gearing up
The Equipment menu equips a Weapon, Armor, Boots, or Accessory you own into its slot.
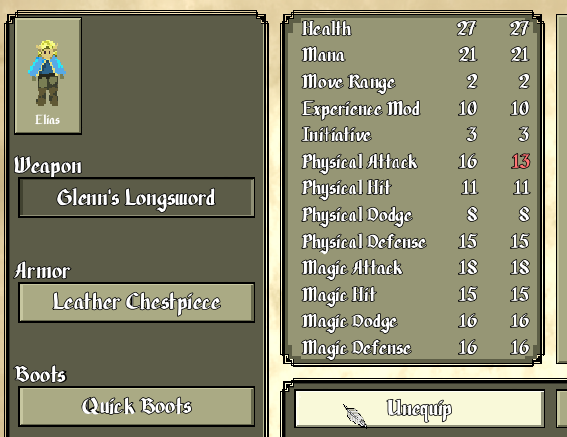
Pick a slot and choose a piece of gear from your bag. The battle stats update live, so you see what a swap does before you commit.
Items: using consumables
The Items menu lists the consumables you carry (and your relics).
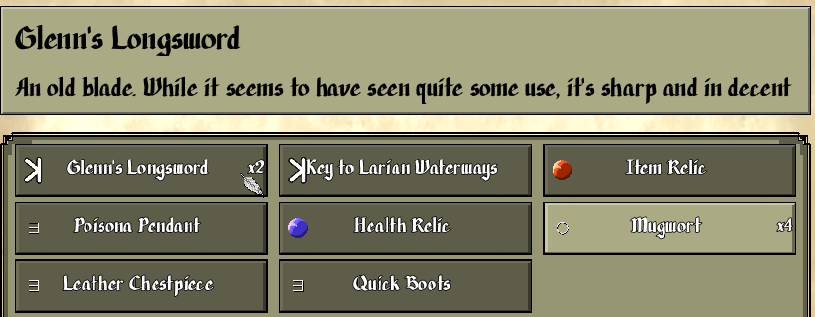
Each item shows a × quantity; selecting one shows its name and effect. Mugwort heals HP, Irid Liquor restores MP, Valerian Powder cures poison. (Using an item in battle needs the Item relic slotted, see Skills.)
Bestiary
The Waterways under Laria hold one family of foe. Each teaches what the next expects you to know. The tile beneath each is the ground it stands on: the Mother needs four.
| Foe | Affinity | Damage | Reach | Reactions | Skills | |
|---|---|---|---|---|---|---|
 | Young Slime | Immune | | 1 | none | none |
 | Young VSlime | Absorb Resistant | | 1 | none | none |
 | Slime | Immune | | 2 | Opportunity Attack | none |
 | VSlime | Absorb Resistant | | 1 | Opportunity Attack | Poison Cloud |
 | Mother Slime | Immune Resistant | | 2 | Opportunity Attack | Poison Cloud, Poison Walk |
Hints & Tips
- Spend your JP and SP after every level. Leveling grants them; the power only lands once you spend it (JP in Status, SP in the Skill Tree). Don't sit on a pile.
- Fill every Relic Slot the moment you unlock one. An empty slot does nothing. The Item relic (drink Mugwort mid-battle) is a good first choice.
- Equip what you buy or find. Gear in your bag does nothing until you put it on in Equipment.
- Heal between fights. Mugwort is your only healing item; the Cure skill restores more, and scales with your stats. Top up before the next room, and rest at a bed when you can.
- A winding-up enemy is an opportunity. Break the charge and it loses both the turn it spent winding up and the one after. But breaking it means standing where it wants you, in reach of everything else in the room — and the blow itself is devastating if you misjudge the bar. Leave the painted cells when the rest of the field is closing in, or when you are built to heal.
- Crits are on your side. Your crit chance beats most enemies'. Even fights swing your way with a little luck.
- Save often: free in the village.
- Use your favorite skills. Skills grow with use (Expertise). Lean on one and it becomes far stronger over a run.
- Take Counterattack early. It sits near the start of the tree and answers the crowding most early fights are built on. Whenever an enemy lands a melee attack from an adjacent tile, you strike back — every time, however often it swings.
- The Mother keeps her distance. She reaches up to two tiles and prefers to stay back, so most of her attacks land from outside Counterattack's reach. Bring range of your own.
Booklet 1.7.0 · Episode One · 24 September 2026